Tips + Tricks
How to prepare your song for a mix engineer in Logic Pro, Ableton Live, or FL Studio

Kenneth Herman
Posted
July 1, 2024
Picture this - you’ve spent months, maybe years on your brand new song. This song is the one. It has your best performance, your catchiest hook, your band is sounding the tightest or the beat goes the craziest. However…you don’t know how to mix it. Thankfully, you’ve found the perfect mix engineer who does. To prepare your song for a mixdown, make sure to follow these essential steps.
Communicate with your mix engineer.
First and foremost, have an open dialogue with your mix engineer. Make sure to provide them with everything they need to make your best work into their best work. Don’t be afraid to ask many, many questions about what they want.
Most mix engineers prefer stems one of two ways: either as-is, or consolidated. Consolidated means that tracks of a similar family of instruments (i.e. synths, drums, guitars) should be bounced as one track. For instance, if you recorded 3 separate tracks of lead, rhythm, and acoustic guitars, a mix engineer who wants a consolidated guitar track would like them all as one track. Some mix engineers will even ask for one track of instrumental, and one track of vocals, depending on their working style.
Be sure to ask your mix engineer essential questions such as:
How do you want my stems to be grouped? Do you want them as-is or consolidated?
What stems do you need dry or wet?
Meaning - with effects on or off.
Should my stems have automation and panning on?
Meaning - should automations in volume or panning be included as-is.
What db do you want these stems to be at?
Meaning - how loud and at what volume should you bounce your stems.
What sample rate should my stems be in?
(Although this is fairly technical, most mix engineers will ask your stems be bounced at the same sample rate they use).
What file format should my stems be?
.WAV or .AIFF are standards.
What file system would you like stems to be uploaded to?
Now that you and your mix engineer have gone back and forth, it’s time to prepare your stems for bouncing.
Preparing your stems within your project file.
The first thing you’re going to want to do is make a copy of your project file and create a new one to prepare your stems. Some DAWs like Logic Pro allow you to make alternative project files.
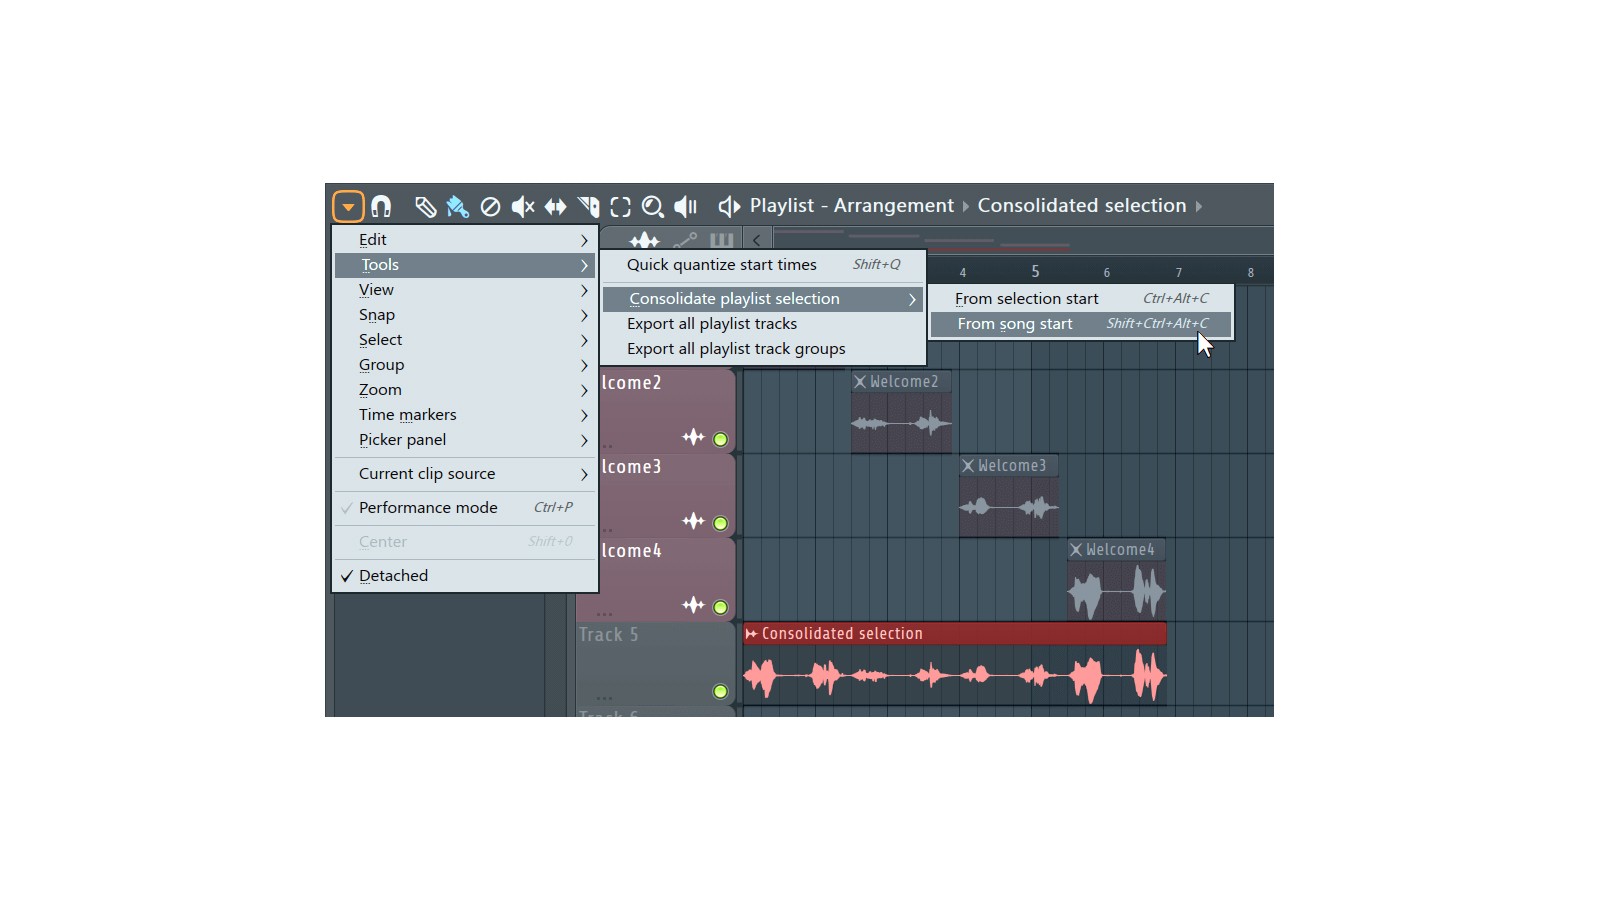
Consolidating your tracks within your DAW is simple. In FL Studio, you can select multiple tracks, right click and hit “Consolidate Clips.”

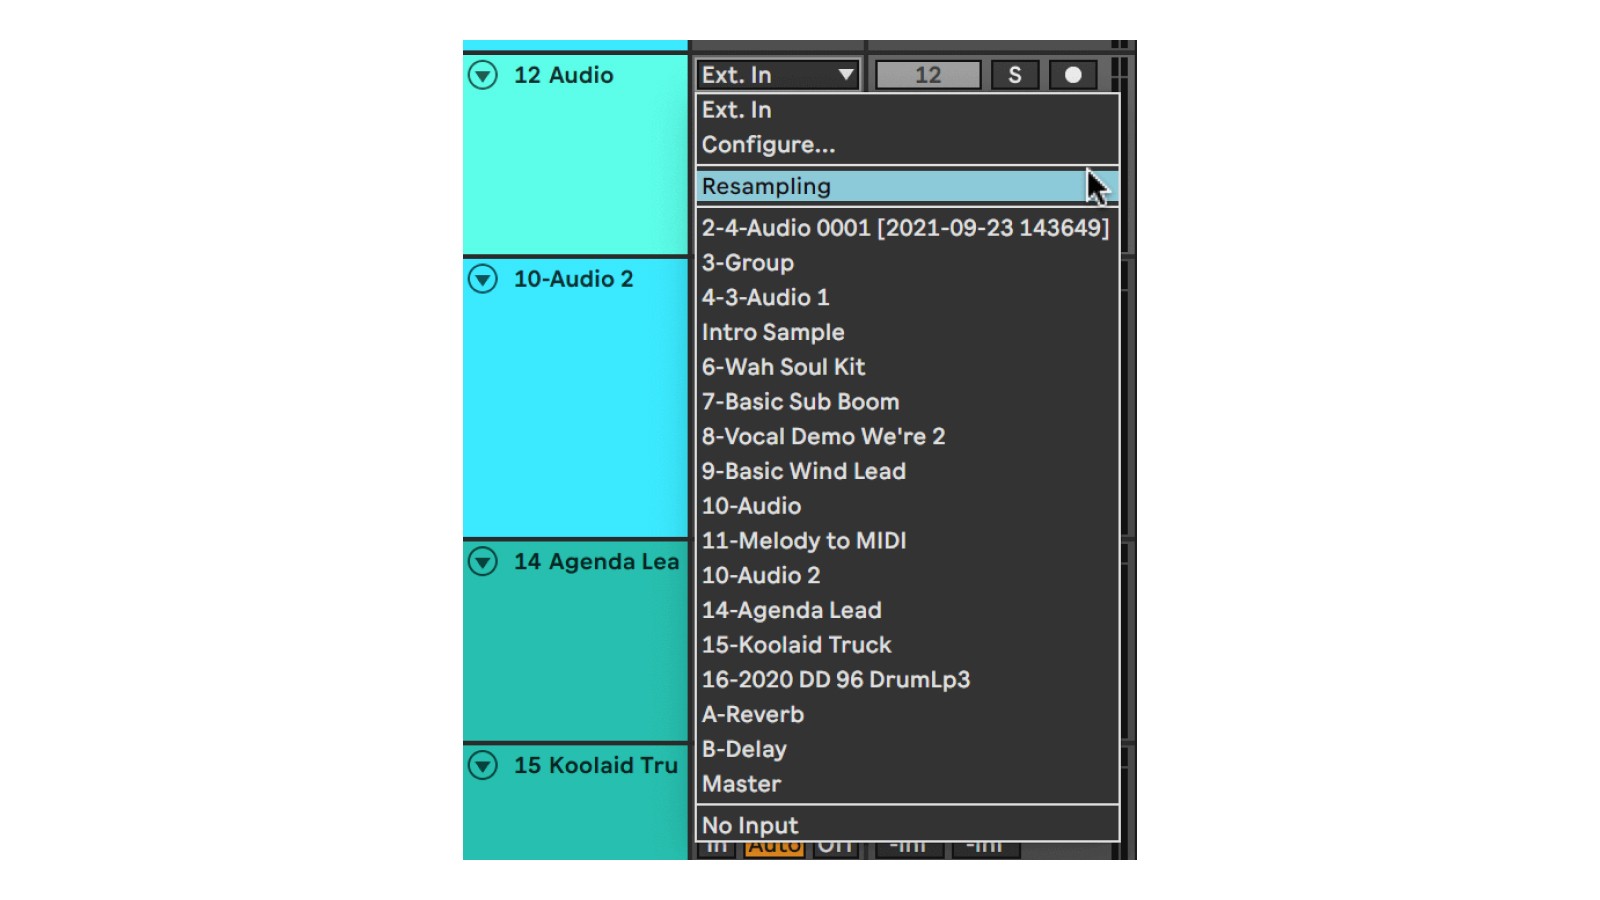
In Ableton, you can use the “Resample” function.

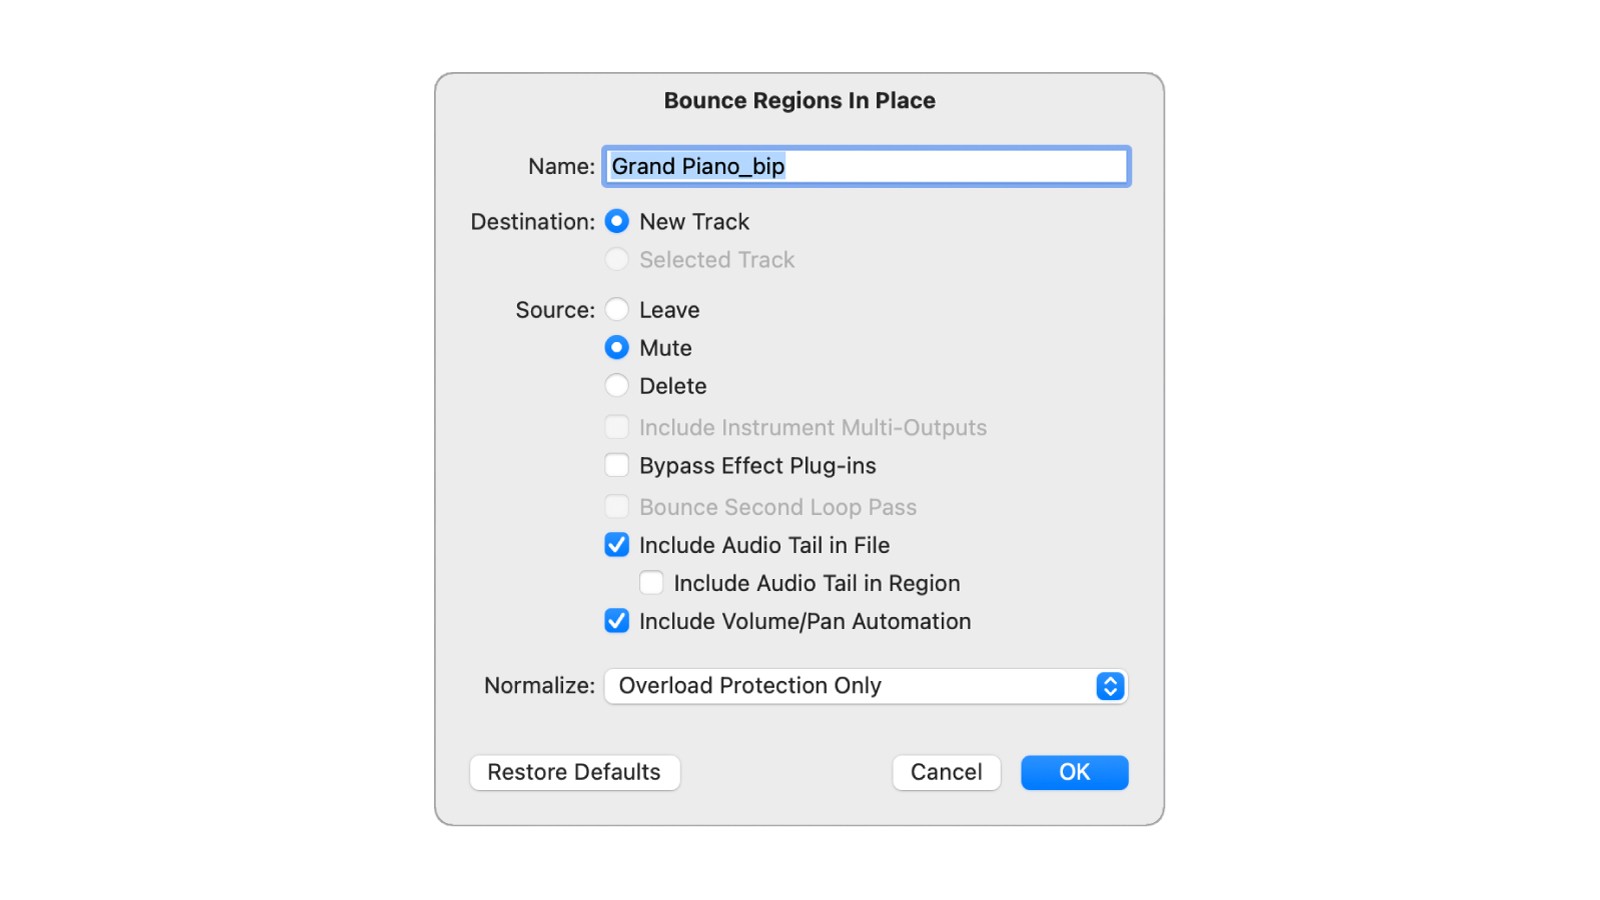
And In Logic Pro, you can select multiple tracks and then hit “Join Per Track.”

Make sure your project file is at the volume, sample rate, and with the level of processing that your mix engineer asked for. Go through that checklist and make sure you follow their instructions.
Exporting your stems out of your DAW:
Each DAW has its own function for exporting tracks seamlessly. We’ve listed out a few videos that show you in detail the best way to export your stems.
Here’s an in-depth video of how to export your stems in FL Studio
Here’s an in-depth video of how to export your stems in Ableton Live
Here’s an in-depth video of how to export your stems in Logic Pro
Now that you’ve exported your files successfully, it’s time to organize your stems.
Organizing and labeling your files.
While most DAWs allow you to rename your stem files, you’re gonna wanna make sure you follow a naming convention that is easiest for your mix engineer. Including your name, the song name, the instrument name, and the individual stem name is always a good idea. An ideal stem file name would be as follows:
ARTIST_NAME_SONG_NAME_INSTRUMENT_STEM_NAME.WAV
An example would be:
PHOEBE_BRIDGERS_MOTION_SICKNESS_GUITARS_DANELECTRO_1.WAV
Next, you’re gonna wanna put each stem into a proper folder. One folder for each instrument is good practice. So a folder for vocals, a folder for guitars, a folder for drums, etc. Remember to label each folder.
There are great tools to automate this process. Check out Bounce Butler, which renames your stems in a snap.
With that out of the way, it’s time to put each folder into a master folder to send to your mix engineer. Label this folder something that includes all the information your mix engineer might need. Be sure to include your name, the song name, the date, and also the key and BPM of the song. An ideal folder name would be as follows:
ARTIST_NAME_SONG_NAME_KEY_BPM_DATE.WAV
An example would be:
THE_1975_PART_OF_THE_BAND_BMAJOR_142BPM_07152022.WAV
Why include information like the key and BPM? The BPM will allow the mix engineer to align your stems within the grid of the DAW that they’re using, helps fix any timing issues within performances, and will make timed effects like delays or reverbs sound better. The key will also help in case there are tuning issues with any instrument and is necessary if a mix engineer is adding plugins like AutoTune themselves.
Now that you’ve made your folder, upload it to Google Drive, Dropbox, or WeTransfer.
Communicating your vision to your mix engineer (with references)
Now with your mix stems ready, it’s very important to communicate what sound you want. Perhaps you want this to sound pop radio ready and make it maximalist and loud and splashy. Perhaps you want it lo-fi, and to feel gentle, quiet, and intimate. Perhaps you don’t know how you want it to sound, but you have other songs in a similar vein you like.
Reference tracks are a great way to communicate your vision to your mix engineer. Include a few songs that have the sonic qualities, emotions, and overall vibe you’re going for in your music as well.
Be sure to also include your original demo alongside your reference tracks. Perhaps within your demo, there are levels, settings, and an aesthetic you want to retain. Maybe you want your mixdown to sound like an elevated version of that original track. Tell your mix engineer what about the demo you like and what you’d like to keep.
But above all, do your best to verbalize the things you’re looking for in your song. Be direct, specific, and clear in your vision for your songs. The better you understand what you want, the better your mix engineer will understand what you want.
Preparing for revisions and feedback.
Perhaps a few days have passed, and your mix engineer sends you their first pass of the mixdown. Exciting! You’re going to want to listen to your mixed song on your speakers or headphones of choice. Be sure to listen on the audio system you’re familiar with, whether it’s the expensive over-ear headphones you make music on, or your Apple AirPods you always use.
Prepare to communicate feedback to your mix engineer. This part of the process might take a few back-and-forths over email. You might have specific notes and feedback at certain parts of the song you heard differently in your head. Maybe you like how the guitars sound in the introduction, but they lose their luster around the chorus. Thankfully, there are new tools to help you and your mix engineer create your best work together.
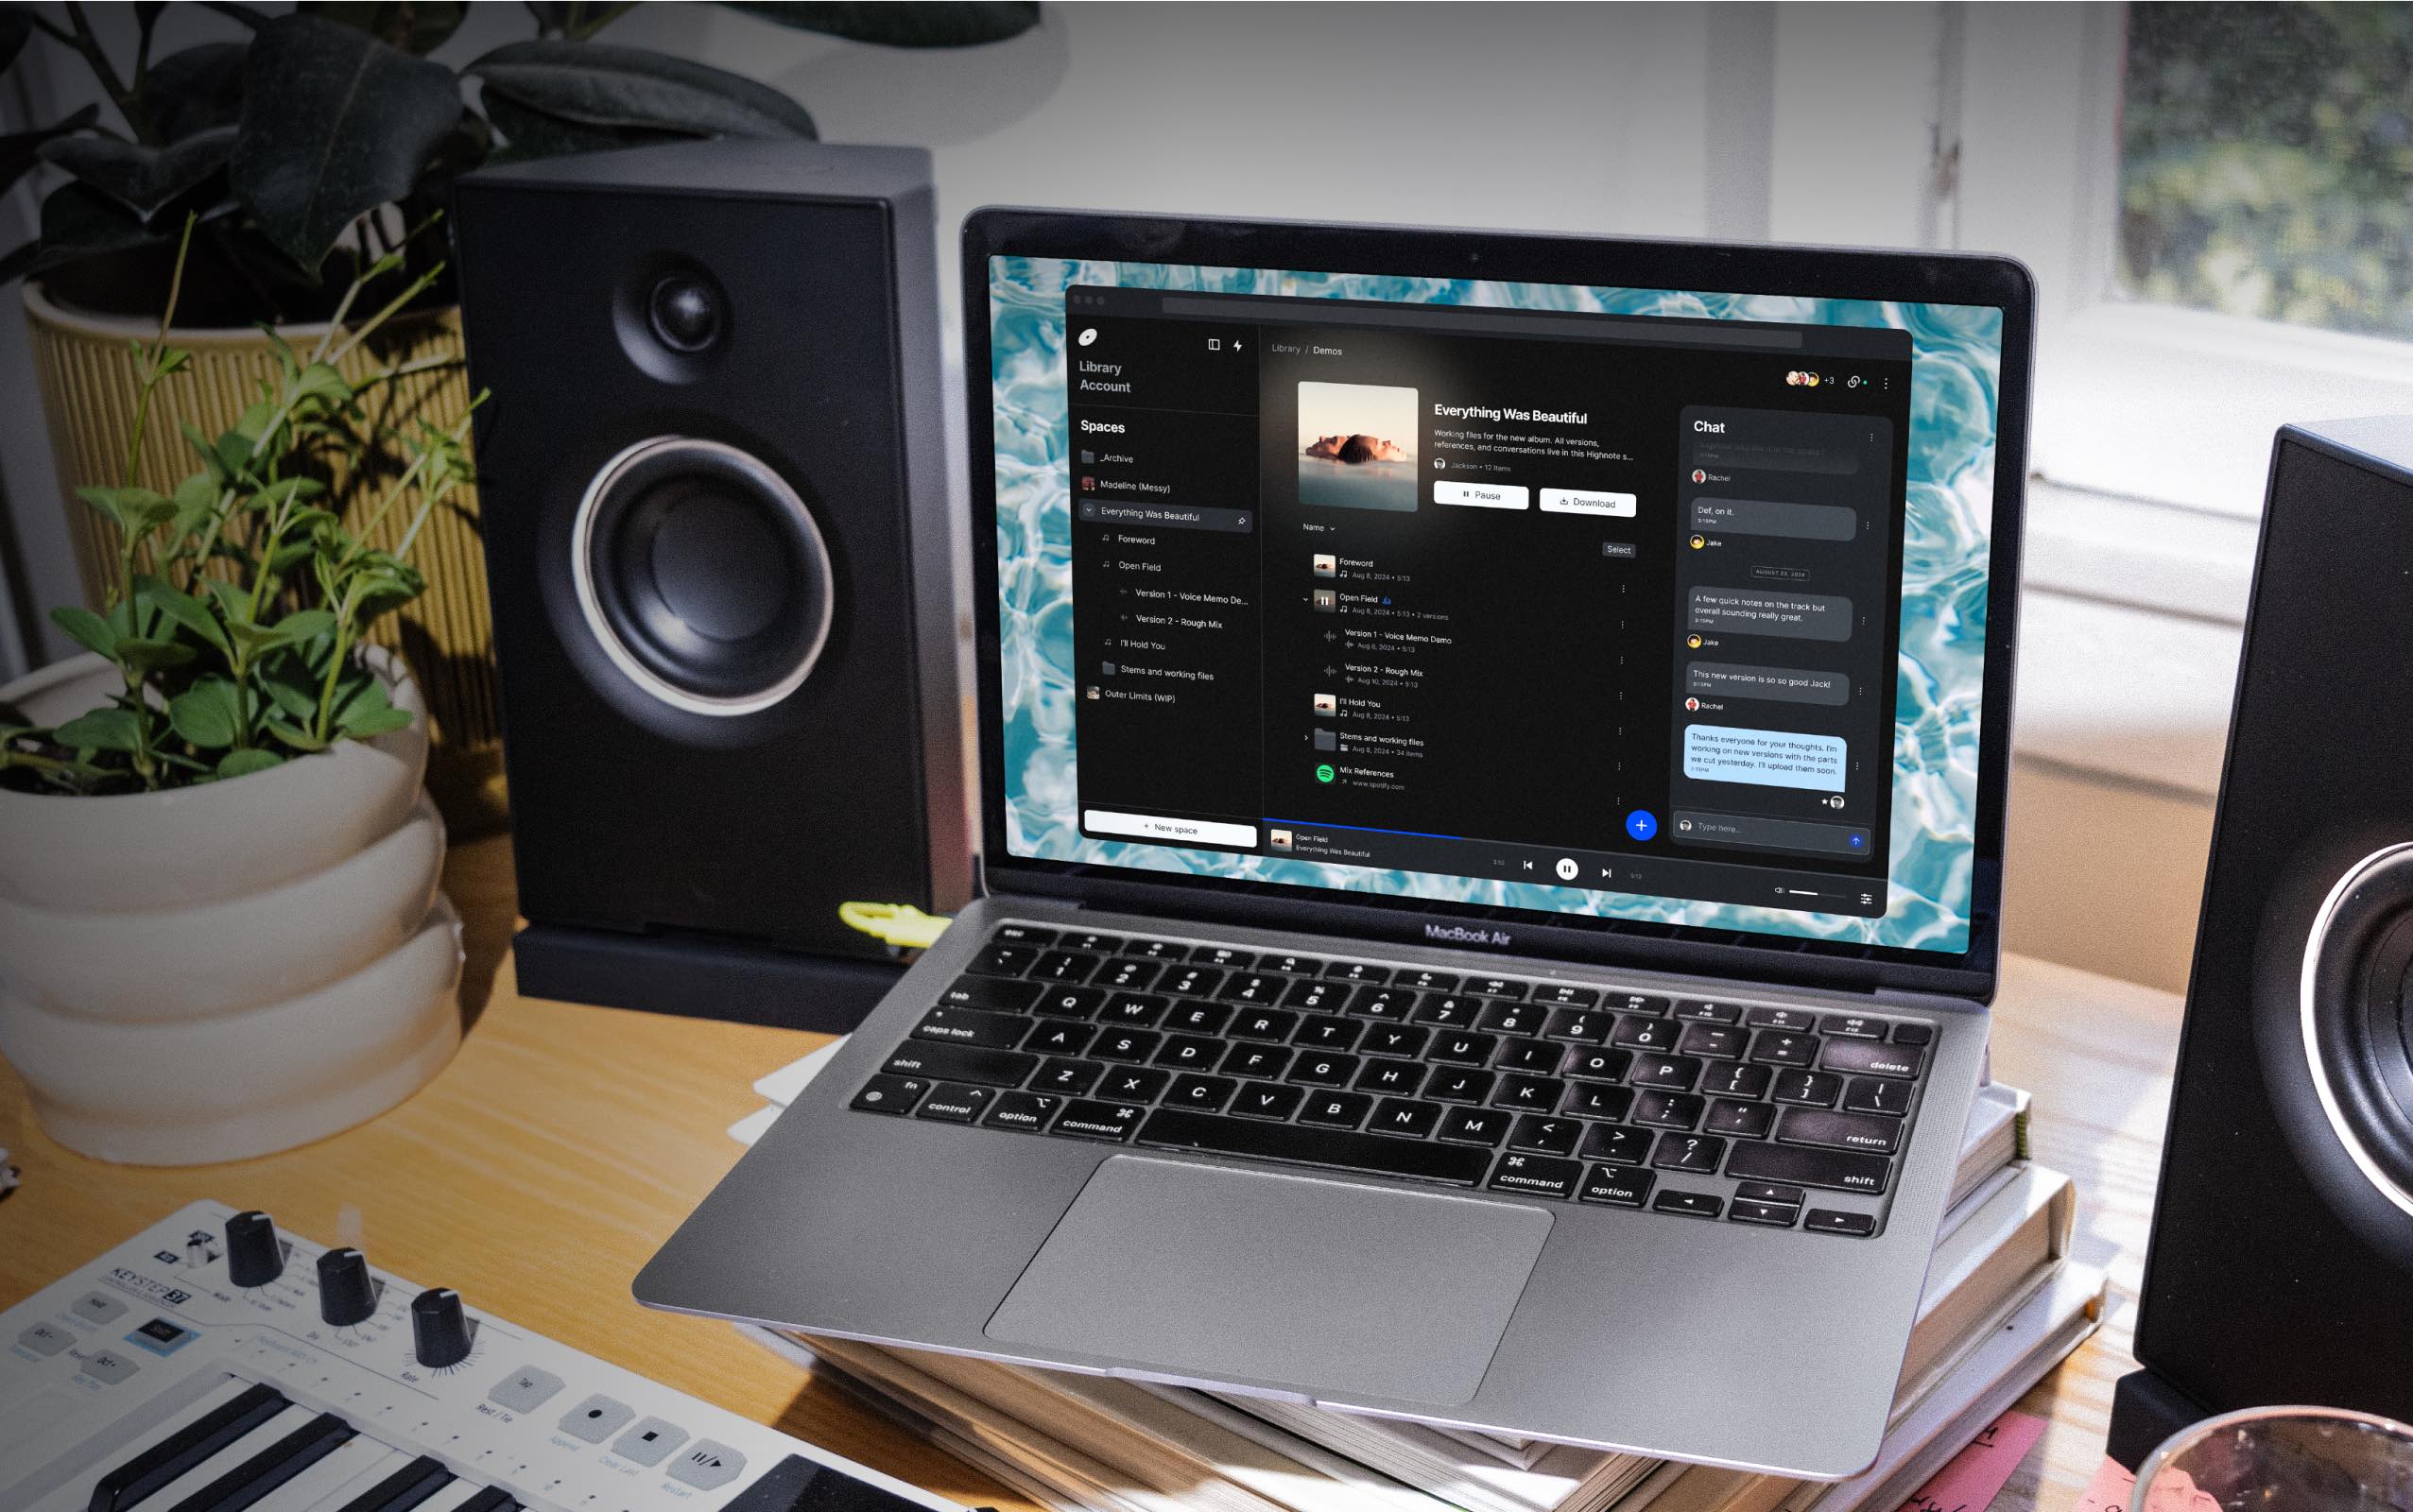
Highnote is the all-in-one file organization and messaging platform for audio collaboration. You can upload each of your mixes and discuss revisions, changes, and feedback in real-time with the Spaces function, as well as A-B test different versions with your mix engineer. Formal plug/discount/sign-up code goes here.
Congratulations on your mixed song! Stay tuned for best practices on mixing, mastering and collaboration on the Noted blog.
Published in
Tips + Tricks
File under:
Mixing
Resources
Ableton


